| (28 intermediate revisions by 8 users not shown) | |||
| Line 8: | Line 8: | ||
| intelligence = 15 |
| intelligence = 15 |
||
| intelligence growth = 1.75 |
| intelligence growth = 1.75 |
||
| − | | damage min = |
+ | | damage min = 19 |
| − | | damage max = |
+ | | damage max = 21 |
| − | | armor = |
+ | | armor = 0 |
| movement speed = 285 |
| movement speed = 285 |
||
| attack range = 450 |
| attack range = 450 |
||
| attack point = 0.3 |
| attack point = 0.3 |
||
| attack backswing = 0.7 |
| attack backswing = 0.7 |
||
| ⚫ | |||
| ⚫ | |||
| bat = 1.7 |
| bat = 1.7 |
||
| missile speed = 900 |
| missile speed = 900 |
||
| Line 25: | Line 23: | ||
}} |
}} |
||
| − | '''Lesale Deathbringer''' the '''Venomancer''' is a [[ranged]] [[agility]] [[hero]] who is focused on dealing damage over time and slowing enemies down. |
+ | '''Lesale Deathbringer''' the '''Venomancer''' is a [[ranged]] [[agility]] [[hero]] who is focused on dealing damage over time and slowing enemies down. While unassuming due to his mediocre stats and low attack range, he can inflict surprising amounts of gradual damage with his poisonous abilities if left alone. Venomancer can unleash a [[#Venomous Gale|Venomous Gale]] to infect enemies in a straight line, drastically slowing them while dealing damage over time. His attacks are just as hazardous thanks to his lethal [[#Poison Sting|Poison Sting]], which adds a toxic effect to his normal attacks, poisoning opposing Heroes for a great amount of damage over a duration. [[#Plague Ward|Plague Ward]] lets him summon a sentient ward to a targeted point, which attacks enemies or structures. While weak on first use its power grows in numbers, which means the more the wards are placed the deadlier they become. This gives him good versatility, providing vision, pushing power, and a helpful block, preventing enemies from running away when trapped in a sticky situation. Venomancer's most dangerous ability is [[#Poison Nova|Poison Nova]], though it isn't lethal and won't kill an enemy by itself, the damage it inflicts is tremendous, the duration is very long, and its wide area of effect makes it difficult to avoid. It is mostly used to [[initiate]] battles, since Poison Nova cannot quickly inflict damage but rather degrades its targets over time. When combined together, the Venomancer is a powerful killing machine, like a virus, slowly killing enemies with venom and poisons. Despite being considered by most players as a [[support]], because of his slowing capabilities, extra ward vision, and being item independent, this doesn't hinder his power to [[gank]] and kill enemies, especially in the earliest parts of the game, and with enough kills, farm, and domination, Venomancer can transition into a [[semi-carry]], with formidable venomous power and deadly specialties. |
| − | ==Bio== |
+ | == Bio == |
{{Hero bio |
{{Hero bio |
||
| name = Lesale Deathbringer |
| name = Lesale Deathbringer |
||
| title = Venomancer |
| title = Venomancer |
||
| quote = No necromancer shall raise what the venomancer puts down. |
| quote = No necromancer shall raise what the venomancer puts down. |
||
| − | | soundclip = |
+ | | soundclip = venm kill 07.mp3 |
| lore = In the Acid Jungles of Jidi Isle, poison runs in the veins and bubbles in the guts of every creature that scuttles, climbs or swoops between fluorescent vines dripping with caustic sap. Yet even in this toxic menagerie, Venomancer is acknowledged as the most venomous. Ages ago, a Herbalist named Lesale crossed the Bay of Fradj by coracle, searching for potent essences that might be extracted from bark and root, and found instead a nightmare transformation. Two leagues into Jidi's jungle, Lesale encountered a reptile camouflaged as an epiphyte, which stung him as he mistakenly plucked it. In desperation, he used his partial knowledge of the jungle's herbal bounty, mixing the venom of the (swiftly throttled) reptile with the nectar of an armored orchid, to compound an antidote. In the moments before a black paralysis claimed him completely, he injected himself by orchid-thorn, and instantly fell into a coma. Seventeen years later, something stirred in the spot where he had fallen, throwing off the years' accumulation of humus: Venomancer. Lesale the Herbalist no longer—but Lesale the Deathbringer. His mind was all but erased, and his flesh had been consumed and replaced by a new type of matter—one fusing the venom of the reptile with the poisonous integument of the orchid. Jidi's Acid Jungles knew a new master, one before whom even the most vicious predators soon learned to bow or burrow for their lives. The lurid isle proved too confining, and some human hunger deep in the heart of the Venomancer drove Lesale out in search of new poisons—and new deaths to bring. |
| lore = In the Acid Jungles of Jidi Isle, poison runs in the veins and bubbles in the guts of every creature that scuttles, climbs or swoops between fluorescent vines dripping with caustic sap. Yet even in this toxic menagerie, Venomancer is acknowledged as the most venomous. Ages ago, a Herbalist named Lesale crossed the Bay of Fradj by coracle, searching for potent essences that might be extracted from bark and root, and found instead a nightmare transformation. Two leagues into Jidi's jungle, Lesale encountered a reptile camouflaged as an epiphyte, which stung him as he mistakenly plucked it. In desperation, he used his partial knowledge of the jungle's herbal bounty, mixing the venom of the (swiftly throttled) reptile with the nectar of an armored orchid, to compound an antidote. In the moments before a black paralysis claimed him completely, he injected himself by orchid-thorn, and instantly fell into a coma. Seventeen years later, something stirred in the spot where he had fallen, throwing off the years' accumulation of humus: Venomancer. Lesale the Herbalist no longer—but Lesale the Deathbringer. His mind was all but erased, and his flesh had been consumed and replaced by a new type of matter—one fusing the venom of the reptile with the poisonous integument of the orchid. Jidi's Acid Jungles knew a new master, one before whom even the most vicious predators soon learned to bow or burrow for their lives. The lurid isle proved too confining, and some human hunger deep in the heart of the Venomancer drove Lesale out in search of new poisons—and new deaths to bring. |
||
}} |
}} |
||
| + | |||
| + | == Gameplay == |
||
== Abilities == |
== Abilities == |
||
| Line 53: | Line 53: | ||
| linkenblock = No |
| linkenblock = No |
||
| ⚫ | |||
| + | | cast backswing = 0.57 |
||
| trait1 = Cast Range |
| trait1 = Cast Range |
||
| value1 = 800 |
| value1 = 800 |
||
| trait2 = Max Travel Distance |
| trait2 = Max Travel Distance |
||
| − | | value2 = |
+ | | value2 = 850 |
| trait3 = Gale Radius |
| trait3 = Gale Radius |
||
| value3 = 125 |
| value3 = 125 |
||
| Line 62: | Line 64: | ||
| value4 = 25/50/75/100 |
| value4 = 25/50/75/100 |
||
| trait5 = Damage over Time |
| trait5 = Damage over Time |
||
| − | | value5 = |
+ | | value5 = 10/40/70/100 |
| trait6 = Move Speed Slow |
| trait6 = Move Speed Slow |
||
| value6 = 50% |
| value6 = 50% |
||
| Line 73: | Line 75: | ||
| notes = * The gale travels at a speed of 1200. |
| notes = * The gale travels at a speed of 1200. |
||
| − | * Can hit units up to |
+ | * Can hit units up to 975 range away (850 travel distance + 125 radius). |
* The [[slow]] deceases over time. Hit units regain 1% of their [[movement speed]] in 0.3 second intervals. |
* The [[slow]] deceases over time. Hit units regain 1% of their [[movement speed]] in 0.3 second intervals. |
||
| Line 81: | Line 83: | ||
* Deals the initial damage upon hitting enemies, and then deals the damage over time in 3 second intervals, resulting in overall 6 damage instances. |
* Deals the initial damage upon hitting enemies, and then deals the damage over time in 3 second intervals, resulting in overall 6 damage instances. |
||
| − | * Venomous Gale can deal up to |
+ | * Venomous Gale can deal up to 75/250/425/600 damage to a single unit (before reductions). |
* Fully affects [[invisible]] units. |
* Fully affects [[invisible]] units. |
||
| Line 103: | Line 105: | ||
| illusionuse = Partially |
| illusionuse = Partially |
||
| illusiontext = Illusions have their own version of Poison Sting, which can only slow. Their attacks place a different debuff,and do not refresh the debuff placed by Venomancer. The slow from the illusion's Poison Sting stacks with the slow of Venomancer's Poison Sting. |
| illusiontext = Illusions have their own version of Poison Sting, which can only slow. Their attacks place a different debuff,and do not refresh the debuff placed by Venomancer. The slow from the illusion's Poison Sting stacks with the slow of Venomancer's Poison Sting. |
||
| + | | uam = No |
||
| trait1 = Damage per Second |
| trait1 = Damage per Second |
||
| Line 111: | Line 114: | ||
| value3 = 6/9/12/15 |
| value3 = 6/9/12/15 |
||
| ⚫ | |||
| − | | notes = * Poison Sting is not a [[Unique_Attack_Modifier|unique attack modifier]]. |
||
| − | |||
| ⚫ | |||
** {{Ability ID|Aphotic Shield|Abaddon}}, {{Ability ID|Backtrack|Faceless Void}}, {{Item ID|Blade Mail}}, {{Item ID|Blink Dagger}}, {{Item ID|Bottle}}, {{Ability ID|Bristleback|Bristleback}}, {{Item ID|Clarity}}, {{Ability ID|Cold Snap|Invoker}}, {{Ability ID|Corrosive Skin|Viper}}, {{Ability ID|Echo Stomp|Elder Titan}}, {{Ability ID|Fatal Bonds|Warlock}}, {{Item ID|Healing Salve}}, {{Item ID|Heart of Tarrasque}}, {{Ability ID|Kraken Shell|Tidehunter}}, {{Ability ID|Living Armor|Treant Protector}}, {{Ability ID|Mana Shield|Medusa}}, {{Item ID|Mjollnir}}, {{Ability ID|Nightmare|Bane}}, {{Ability ID|Open Wounds|Lifestealer}}, {{Item ID|Orchid Malevolence}}, {{Ability ID|Recall|Keeper of the Light}}, {{Ability ID|Refraction|Templar Assassin}}, {{Ability ID|Return|Lone Druid}}, {{Ability ID|Soul Assumption|Visage}}, {{Ability ID|Spiked Carapace|Nyx Assassin}}, {{Ability ID|Spin Web|Broodmother}}, {{Ability ID|Summon Spirit Bear|Lone Druid}} and {{Item ID|Urn of Shadows}}. |
** {{Ability ID|Aphotic Shield|Abaddon}}, {{Ability ID|Backtrack|Faceless Void}}, {{Item ID|Blade Mail}}, {{Item ID|Blink Dagger}}, {{Item ID|Bottle}}, {{Ability ID|Bristleback|Bristleback}}, {{Item ID|Clarity}}, {{Ability ID|Cold Snap|Invoker}}, {{Ability ID|Corrosive Skin|Viper}}, {{Ability ID|Echo Stomp|Elder Titan}}, {{Ability ID|Fatal Bonds|Warlock}}, {{Item ID|Healing Salve}}, {{Item ID|Heart of Tarrasque}}, {{Ability ID|Kraken Shell|Tidehunter}}, {{Ability ID|Living Armor|Treant Protector}}, {{Ability ID|Mana Shield|Medusa}}, {{Item ID|Mjollnir}}, {{Ability ID|Nightmare|Bane}}, {{Ability ID|Open Wounds|Lifestealer}}, {{Item ID|Orchid Malevolence}}, {{Ability ID|Recall|Keeper of the Light}}, {{Ability ID|Refraction|Templar Assassin}}, {{Ability ID|Return|Lone Druid}}, {{Ability ID|Soul Assumption|Visage}}, {{Ability ID|Spiked Carapace|Nyx Assassin}}, {{Ability ID|Spin Web|Broodmother}}, {{Ability ID|Summon Spirit Bear|Lone Druid}} and {{Item ID|Urn of Shadows}}. |
||
| Line 126: | Line 127: | ||
| duration = 40 |
| duration = 40 |
||
| hp = 75/200/325/450 |
| hp = 75/200/325/450 |
||
| − | | damage = 9-11/17-21/<br /> |
+ | | damage = [[Physical|{{tooltip|9-11/17-21/<br /> |
| − | 26-32/34-42 |
+ | 26-32/34-42|Piercing Damage}}]] |
| − | ([[Damage types|Piercing damage]]) |
||
| armor = 0 |
| armor = 0 |
||
| move speed = 0 |
| move speed = 0 |
||
| Line 140: | Line 140: | ||
| bounty = 14-17 |
| bounty = 14-17 |
||
| experience = 20/25/30/35 |
| experience = 20/25/30/35 |
||
| + | | notes = Unit type: [[Ward]]<br />Abilities:<br />[[File:Poison Sting icon.png|16px]] [[Venomancer#Poison Sting|{{tooltip|Poison Sting|Based on Venomancer's Poison Sting level, damage halfed}}]] |
||
| − | | notes = Unit type: [[Ward]] |
||
}} |
}} |
||
{{Ability |
{{Ability |
||
| Line 155: | Line 155: | ||
| purgeable = No |
| purgeable = No |
||
| + | | cast point = 0 |
||
| + | | cast backswing = 0.63 |
||
| trait1 = Cast Range |
| trait1 = Cast Range |
||
| value1 = 850 |
| value1 = 850 |
||
| Line 173: | Line 175: | ||
* The damage source of the wards' Poison Sting is set to be the wards themselves, and not Venomancer. |
* The damage source of the wards' Poison Sting is set to be the wards themselves, and not Venomancer. |
||
| − | * Plague Wards have a lower target priority than units and heroes, so they are attacked by [[towers]] and [[lane creeps]] |
+ | * Plague Wards have a lower target priority than units and heroes, so they are attacked by [[towers]] and [[lane creeps]] last. |
* The wards gain their spell immunity through a buff, so it is possible for enemies to check the buff and guess how long it will last. |
* The wards gain their spell immunity through a buff, so it is possible for enemies to check the buff and guess how long it will last. |
||
| Line 197: | Line 199: | ||
| purgeable = No |
| purgeable = No |
||
| + | | cast point = 0 |
||
| + | | cast backswing = 0.87 |
||
| trait1 = Radius |
| trait1 = Radius |
||
| value1 = 575 |
| value1 = 575 |
||
| Line 202: | Line 206: | ||
| value2 = 255 |
| value2 = 255 |
||
| trait3 = Damage Per Second |
| trait3 = Damage Per Second |
||
| − | | value3 = 36/58/81 (58/81/108 |
+ | | value3 = 36/58/81 ({{Symbol|Aghanim}} 58/81/108) |
| trait4 = Duration |
| trait4 = Duration |
||
| − | | value4 = 12/14/15 (14/15/16 |
+ | | value4 = 12/14/15 ({{Symbol|Aghanim}} 14/15/16) |
| mana = 200/300/400 |
| mana = 200/300/400 |
||
| − | | cooldown = 140/120/100 (140/120/60 |
+ | | cooldown = 140/120/100 ({{Symbol|Aghanim}} 140/120/60) |
| aghanimsupgrade = Increases damage and duration, and decreases cooldown. |
| aghanimsupgrade = Increases damage and duration, and decreases cooldown. |
||
| Line 229: | Line 233: | ||
}} |
}} |
||
| − | ==Recommended items== |
+ | == Recommended items == |
{{Recommendeditems |
{{Recommendeditems |
||
| explanation = |
| explanation = |
||
| + | |||
'''Starting items:''' |
'''Starting items:''' |
||
* [[Tango]] and [[Healing Salve]] allow you to stay in lane longer without going back to the fountain. |
* [[Tango]] and [[Healing Salve]] allow you to stay in lane longer without going back to the fountain. |
||
| − | * [[Ring of Protection]] gives you some armor while laning, and can be |
+ | * [[Ring of Protection]] gives you some armor while laning, and can be upgraded to a {{Item ID|Ring of Basilius}} from the side shop. |
* As a support, purchasing the [[Animal Courier]] is essential for your team. |
* As a support, purchasing the [[Animal Courier]] is essential for your team. |
||
| − | * A [[Clarity]] is optional, but recommended, if you have any spare gold. Venomancer's base mana pool and Intelligence growth are quite poor, and casting Venomous Gale once at level 1 will drain more than half of your mana pool. |
+ | * A [[Clarity]] is optional, but recommended, if you have any spare gold. Venomancer's base mana pool and Intelligence growth are quite poor, and casting {{Ability ID|Venomous Gale|Venomancer}} once at level 1 will drain more than half of your mana pool. |
| + | |||
'''Early game:''' |
'''Early game:''' |
||
* [[Magic Stick]] provides good regeneration, especially if you're laning against opponents who keep casting their abilities. |
* [[Magic Stick]] provides good regeneration, especially if you're laning against opponents who keep casting their abilities. |
||
| + | * [[Boots of Speed]] are important to get early on Venomancer, as his base movement speed is quite low. More mobility allows you to position yourself for your spells, particularly Venomous Gale. |
||
| − | * [[Boots of Speed]] grant more movement speed. |
||
| − | * [[Ring of Aquila]] solves most of your problems in the early game. It gives flat mana regeneration, which is useful due to Venomancer's low |
+ | * [[Ring of Aquila]] solves most of your problems in the early game. It gives flat mana regeneration, which is useful due to Venomancer's low base intelligence, as well as good attributes and some armor. The mana regen allows you to place {{Ability ID|Plague Ward|Venomancer}}s without running out of mana, and the armor aura can also help you push lanes more easily due to giving your lane creeps more survivability. |
| + | |||
'''Core items:''' |
'''Core items:''' |
||
* [[Magic Wand]] gives attributes and regeneration: it's always handy to have this item for emergencies. |
* [[Magic Wand]] gives attributes and regeneration: it's always handy to have this item for emergencies. |
||
| − | * [[Power Treads]] are a good purchase as the extra attributes can be used either to increase your |
+ | * [[Power Treads]] are a good purchase as the extra attributes can be used either to increase your intelligence to make casting easier or to increase your strength to give you more survivability. Additionally, the bonus attack speed helps you with applying {{Ability ID|Poison Sting|Venomancer}} to enemies with your attacks. |
| − | * [[Aghanim's Scepter]] greatly increases the killing potential of |
+ | * [[Aghanim's Scepter]] greatly increases the killing potential of {{Ability ID|Poison Nova|Venomancer}}: it can deal up to 1836 non-lethal damage before magic resistance reductions, making it perfect for initiations when assisted by teammates. |
| − | * [[Observer Ward]]s are a core requirement as a support. While you can place Plague Wards to scout enemy movement, they are limited in vision and sight range, and can be far more easily spotted and destroyed. |
+ | * [[Observer Ward]]s are a core requirement as a support. While you can place Plague Wards to scout enemy movement, they are limited in vision, duration and sight range, and can be far more easily spotted and destroyed. |
* [[Town Portal Scroll]] is necessary on virtually all heroes, but is important in Venomancer's case due to his ability to show up to teamfights to cast his nukes and slows, and defend a tower and counter-push at the same time. As well, his low mobility and lack of escape abilities means that having a TP scroll on hand at all times should be the case. |
* [[Town Portal Scroll]] is necessary on virtually all heroes, but is important in Venomancer's case due to his ability to show up to teamfights to cast his nukes and slows, and defend a tower and counter-push at the same time. As well, his low mobility and lack of escape abilities means that having a TP scroll on hand at all times should be the case. |
||
| + | |||
'''Situational items:''' |
'''Situational items:''' |
||
| − | * [[Veil of Discord]] provides attributes and armor for Venomancer as well as the item's active |
+ | * [[Veil of Discord]] provides attributes and armor for Venomancer as well as the item's active, Magic Weakness, which increases the effectiveness of all of Venomancer's spells and even his passive. Though not as powerful as Aghanim's Scepter regarding Poison Nova, Veil can serve as a cheaper alternative if the player suffers from poor farm. On the other hand, however, a well-farmed player with Aghanim's Scepter can invest on a Veil for an astounding amount of damage over time. Having a Veil can also be a valuable asset for your teammates if you have a caster-heavy lineup. |
| − | * [[Eul's Scepter of Divinity]] will give a lot of mana regeneration, some movement speed and |
+ | * [[Eul's Scepter of Divinity]] will give a lot of mana regeneration, some movement speed and intelligence, eliminating your mobility and mana issues almost entirely. It also makes positioning for casting your spells easier by disabling an opponent for a short time, and can be used to temporarily save yourself after casting Poison Nova amongst the middle of the enemy team. |
| − | * [[Blink Dagger]] is the best choice if you are your team's main initiator. Use it to position yourself before casting |
+ | * [[Blink Dagger]] is the best choice if you are your team's main initiator. Use it to position yourself before casting Poison Nova and/or Venomous Gale. |
| − | * [[Shadow Blade]] gives more damage, more attack speed and a useful escape mechanism. You can also use its ability to |
+ | * [[Shadow Blade]] gives more damage, more attack speed and a useful escape mechanism. You can also use its ability to initiate on the enemy team and cast your ultimate. |
| + | * [[Butterfly]] is a very expensive item and generally not recommended when playing as a support. It drastically increases Venomancer's attack speed and damage, as well as giving him evasion and a small amount of armor, allowing him to weather physical attacks better and apply Poison Sting to multiple targets over a short amount of time. |
||
* [[Orchid Malevolence]] will solve all of your mana problems and give you more physical damage per second. Additionally, the silence can be used to disable enemies, which is useful both as a semi-carry and support. |
* [[Orchid Malevolence]] will solve all of your mana problems and give you more physical damage per second. Additionally, the silence can be used to disable enemies, which is useful both as a semi-carry and support. |
||
| + | * [[Manta Style]] gives Venomancer more overall stats, as well as movement speed. Its active can be used to remove debuffs from yourself, and the illusions can assist in applying slows to enemy targets as their Poison Sting can stack with your own. |
||
* [[Drum of Endurance]] gives Venomancer stats across the board, and the increased movement speed can offset his low mobility somewhat. The extra attack speed also helps him apply his Poison Sting more easily. |
* [[Drum of Endurance]] gives Venomancer stats across the board, and the increased movement speed can offset his low mobility somewhat. The extra attack speed also helps him apply his Poison Sting more easily. |
||
* [[Flying Courier]] should be purchased if you have enough gold to do so at the 3 minute mark. Giving your mid the ability to retrieve needed items more easily, as well as bottle crow as necessary, are essential to giving your team a major strategic advantage. |
* [[Flying Courier]] should be purchased if you have enough gold to do so at the 3 minute mark. Giving your mid the ability to retrieve needed items more easily, as well as bottle crow as necessary, are essential to giving your team a major strategic advantage. |
||
| − | '''Unmentioned items:''' |
||
| ⚫ | * |
||
| ⚫ | |||
| ⚫ | |||
| − | * [[Ghost Scepter]] is almost mandatory for a frail support that is being focused down by the enemy team constantly. As it prevents you from suffering Physical damage, it can give you enough time to cast Poison Nova and Venomous Gale on the enemy team, increasing your teamfight contribution. |
||
| ⚫ | |||
}} |
}} |
||
| − | == |
+ | == Equipment == |
| ⚫ | |||
| ⚫ | * As an |
||
| + | |||
| ⚫ | |||
| + | == Tips == |
||
| ⚫ | |||
| + | * In general, Venomancer should be played as a pushing support who provides utility to his team, rather than as a fighter, due to his general frailty and low movement speed. As such, many of the more expensive recommended luxury items that focus on physical damage output should not be built at all, as they provide little comparative benefit and do not synergize well with Venomancer's skills. Instead, focus on building mobility and utility items that help your team without requiring you to jump into the fray outside of casting your spells. |
||
| ⚫ | * As an agility caster, Venomancer suffers from severe mana problems. It is recommended to focus on increasing the size of your mana pool and purchasing mana regen items when possible. Due to the high mana cost of Poison Nova, you will need to carefully manage your mana so that you can cast it in a teamfight. |
||
| + | * {{Ability ID|Venomous Gale|Venomancer}} applies a strong slow on any enemies it hits, significantly reducing their movement speed. Because of its disable potential, at least one early level is recommended, if not the first spell you take. |
||
| ⚫ | |||
| ⚫ | |||
| + | ** Keep in mind that Venomous Gale deals no damage over time at level 1. Therefore, if you want the spell to do more than apply a small amount of initial damage and slow its victims, at least one additional level should be taken. |
||
** Try to keep Venomous Gale off cooldown unless it is absolutely needed. Its cooldown is quite long, and you may need to use its slow on enemy heroes when an unexpected situation arises. |
** Try to keep Venomous Gale off cooldown unless it is absolutely needed. Its cooldown is quite long, and you may need to use its slow on enemy heroes when an unexpected situation arises. |
||
| + | * {{Ability ID|Poison Sting|Venomancer}} applies a movement speed slow and damage over time to Venomancer's attacks, allowing him to use his right-clicks as a form of disable. Half of the damage from this ability (but not the slow) is also applied to Plague Ward attacks. |
||
| ⚫ | |||
| + | ** Poison Sting deals small amounts of damage and the slow scales poorly, however it has a very long duration at max level, allowing it to deal a surprising amount of damage over time. The ability is best used to apply a "permanent" movement speed slow to all enemy heroes in a fight or gank, reducing their ability to chase or escape. |
||
| + | ** Remember that the damage from Poison Sting itself is not recognized by the game as player damage, and thus enemies can still use their Blink Daggers or regen items even while under the effects of its damage. As such, make sure to regularly attack enemy players with your right-clicks in order to inflict player damage on them. |
||
| ⚫ | |||
** Be careful when trying to apply Poison Sting to enemy heroes with your attacks. Venomancer's attack range is quite short, so it is easy to accidentally put yourself out of position. |
** Be careful when trying to apply Poison Sting to enemy heroes with your attacks. Venomancer's attack range is quite short, so it is easy to accidentally put yourself out of position. |
||
| − | ** When |
+ | ** When killing creep waves or neutral camps, attack each creep once at the beginning to apply the Poison Sting debuff to all of them. This will drastically increase the amount of damage you can do to them, as they will all be taking damage over time right from the beginning, increasing the net amount of damage you do. |
| + | ** The idea behind leveling this ability to boost the effectiveness of your Plague Wards is that it allows them to deal the damage over time after you have left them in place and moved on. When using them in active pushes or defense, Venomancer can apply his own Poison Sting to enemy creeps, overriding that of the Plague Wards, but if he needs to go elsewhere after deploying a cluster of wards then they can benefit from Poison Sting and whittle down creep waves more effectively. |
||
| ⚫ | |||
| + | * {{Ability ID|Plague Ward|Venomancer}} is Venomancer's signature ability, allowing him to place a large number wards in a short duration that augment his firepower and provide vision. |
||
| ⚫ | ** Due to how frail they are and how little damage they do at level 1 and 2, it is not recommended that you cast Plague Wards too frequently during the laning stage, as they will only provide gold for the enemy. As well, while they are spammable and cost small amounts of mana, placing enough to cause any meaningful amount of damage will cost significantly more mana. |
||
| ⚫ | ** Plague Wards deal weak damage in sparse numbers and at early levels, but their power becomes significant when once 3 or more skill points are placed in them and they are massed in one location. If you are employing an early push strategy, it is wise to max Plague Wards first in order to put as much cheap Physical damage on the field as possible. |
||
| ⚫ | ** If farming jungle camps with Plague Wards, avoid placing them as the ability comes off cooldown inside the camp itself. This reduces the amount of damage that the wards can do, and will block the camp from spawning if the wards persist at the minute mark. Instead, place a cluster of wards outside of the camp and then aggro the creeps into your wards. This will concentrate their firepower and reduce the amount of damage you take, plus it allows you to use the same ward cluster to |
||
| + | ** Venomancer's attack range can effectively be increased by 1000 by casting Plague Wards at their maximum range. While Venomancer's attack range is only 450, he can place Plague Wards up to 850 range away, and they will attack targets 600 range away, boosting his striking range to 1450. |
||
| ⚫ | |||
| + | ** Plague Wards deal Piercing damage, which means that they deal increased damage against lane creeps but are less effective against towers and siege creeps. |
||
| + | *** When pushing a lane, try to place your initial wave of Plague Wards just outside of the enemy tower's attack range. This way, you can safely mass them in order to make short work of the enemy's creep wave as they approach, as well as delay the creep wave at that location and give your creeps time to move forward. |
||
| + | *** Once your creep wave moves forward to attack the enemy's tower, only then should you place your second wave of Plague Wards within range to attack the tower. Without cover, the tower can make short work of your Plague Wards, preventing you from massing them. Try to place your ward cluster on the opposite side of the enemy tower, in the direction of the enemy's base, so that they attract the enemy creep wave's aggro and hold them in position, preventing them from attacking your creeps and defending the tower. |
||
| ⚫ | ** Due to how frail they are and how little damage they do at level 1 and 2, it is not recommended that you cast Plague Wards too frequently during the laning stage, as they will only provide gold and experience for the enemy. As well, while they are spammable and cost small amounts of mana, placing enough to cause any meaningful amount of damage will cost significantly more mana. |
||
| ⚫ | ** If farming jungle camps with Plague Wards, avoid placing them as the ability comes off cooldown inside the camp itself. This reduces the amount of damage that the wards can do, and will block the camp from spawning if the wards persist at the minute mark. Instead, place a cluster of wards outside of the camp and then aggro the creeps into your wards. This will concentrate their firepower and reduce the amount of damage you take, plus it allows you to use the same ward cluster to work down two or even three neighboring camps simultaneously by pulling them into one location where the wards can attack them and automatically aggro them back with the poison damage. |
||
| ⚫ | |||
** When chasing an enemy, constantly put Plague Wards ahead of them to maintain sight. They can also help slow the enemy by blocking their path. |
** When chasing an enemy, constantly put Plague Wards ahead of them to maintain sight. They can also help slow the enemy by blocking their path. |
||
** You can place Plague Wards within juke paths to block the enemy team's movements if you are fighting in the jungle. This can be used to either stop the enemy from juking by closing off the path that they want to take, or to prevent them from pursuing you after passing through a narrow path by blocking it. |
** You can place Plague Wards within juke paths to block the enemy team's movements if you are fighting in the jungle. This can be used to either stop the enemy from juking by closing off the path that they want to take, or to prevent them from pursuing you after passing through a narrow path by blocking it. |
||
** Remember that you can control your Plague Wards as immovable units. This can be useful if you want to change attack targets, stop a Plague Ward's auto attack or deny friendly creeps and runes, and even destroy the [[Aegis of the Immortal]]. |
** Remember that you can control your Plague Wards as immovable units. This can be useful if you want to change attack targets, stop a Plague Ward's auto attack or deny friendly creeps and runes, and even destroy the [[Aegis of the Immortal]]. |
||
| + | * {{Ability ID|Poison Nova|Venomancer}} is a tremendously powerful debuff that can deal large amounts of magical damage to the enemy. While it lacks immediate punch and does not contribute much to a fight at the start, it can potentially kill the entire enemy team after a few seconds, securing kills and allowing your team to take map objectives afterward. |
||
| ⚫ | * Unless you have teammates who can follow up, do not use Poison Nova out of spite if you are about to be killed, as the cooldown is very long and it will not result in any kills unless the enemy is affected by other damage-over-time debuffs. The only exception to this is if you have Aghanim's Scepter and are level 16 or higher, as the cooldown will then reduce to below your respawn duration. |
||
| + | ** Even if the enemy activates spell immunity before you can cast your ultimate, keep in mind that the debuff will still be applied to them, and they will start taking damage immediately once their spell immunity expires. While spell immunity will effectively waste a few seconds of your ultimate, it can still deal a lot of damage to them. |
||
| ⚫ | ** Unless you have teammates who can follow up, do not use Poison Nova out of spite if you are about to be killed, as the cooldown is very long and it will not result in any kills unless the enemy is affected by other damage-over-time debuffs. The only exception to this is if you have Aghanim's Scepter and are level 16 or higher, as the cooldown will then reduce to below your respawn duration. |
||
** Remember that Poison Nova can never bring an enemy below 1 HP by itself. Therefore, you should try to apply Venomous Gale or Poison Sting to your opponents immediately before or after casting Poison Nova, as both debuffs last as long as Poison Nova itself and can help guarantee that they do not survive the Poison Nova. |
** Remember that Poison Nova can never bring an enemy below 1 HP by itself. Therefore, you should try to apply Venomous Gale or Poison Sting to your opponents immediately before or after casting Poison Nova, as both debuffs last as long as Poison Nova itself and can help guarantee that they do not survive the Poison Nova. |
||
| + | * Other items not listed under Situational items can be useful to Venomancer's kit: |
||
| − | * Positioning items like [[Force Staff]], [[Blink Dagger]] or [[Shadow Blade]] are good items to build on Venomancer, as his frailty and lack of easily-used escape mechanisms are his Achilles' heel. Additionally, harder disables provided by items such as [[Eul's Scepter of Divinity]] and [[Orchid Malevolence]] can greatly increase his offensive potential. |
||
| ⚫ | ** {{Item ID|Sentry Ward}}s are crucial on Venomancer as a support item. As he can place Plague Wards through terrain and fog of war to get vision, he can easily place Sentry Wards alongside them to de-ward enemy Observer Wards. Since Plague Wards are summoned units, he can "set and forget" them after finding an Observer Ward, rather than risk getting ganked by staying to de-ward. |
||
| ⚫ | ** {{Item ID|Arcane Boots}} are highly recommended on Venomancer, as his ultimate costs a large amount of mana and his mana pool is otherwise extremely limited. As a support, you also help your team by being able to replenish their mana as well as your own, allowing you to cast your spells more often. |
||
| ⚫ | |||
| + | ** {{Item ID|Ghost Scepter}} is very helpful for giving Venomancer protection against physical damage. It can be used to buy yourself some time if you're jumped on by the enemy team in a gank or teamfight, or allow you to survive long enough to cast Venomous Gale after using your ultimate. |
||
| + | ** {{Item ID|Shiva's Guard}} is expensive, but provides Venomancer with many strong benefits. It gives him a much larger mana pool to use, allowing him to better utilize his spells, and gives him armor for resisting physical damage. The auras add to his ability to slow enemy heroes, and the active can be used in conjunction with Poison Nova to slow enemies enough to catch them in its radius, as well as add an additional movement speed slow on top of Venomous Gale and Poison Sting. |
||
| ⚫ | |||
== Trivia == |
== Trivia == |
||
* Venomancer's name, Lesale, may be a reference to "Le Sale", which is French for "The Dirty" or "The Nasty". |
* Venomancer's name, Lesale, may be a reference to "Le Sale", which is French for "The Dirty" or "The Nasty". |
||
| − | * In Warcraft DotA, Venomancer's hero model was a hydralisk. Hydralisks are a |
+ | * In Warcraft DotA, Venomancer's hero model was a hydralisk. Hydralisks are a ranged combat unit of the Zerg, an alien race in ''Blizzard Entertainment'''s RTS game ''Starcraft''. Hydralisks are a very common and well-known image in Blizzard games.<ref>[http://starcraft.wikia.com/wiki/Hydralisk]Hydralisks, [http://www.playdota.com/heroes/venomancer the model Venomancer uses in DotA].</ref> |
| − | |||
| − | == Equipment == |
||
| ⚫ | |||
== Update history == |
== Update history == |
||
{{Update History| |
{{Update History| |
||
| − | '''[[ |
+ | '''[[December 17, 2014 Patch#Update 5|December 17, 2014 Patch Update 5]]''' |
* Fixed the damage source of the {{Ability ID|Plague Ward|Venomancer}}s' {{Ability ID|Poison Sting|Venomancer}} to be the wards, instead of Venomancer |
* Fixed the damage source of the {{Ability ID|Plague Ward|Venomancer}}s' {{Ability ID|Poison Sting|Venomancer}} to be the wards, instead of Venomancer |
||
| Line 301: | Line 325: | ||
'''[[January 03, 2013 Patch]]''' |
'''[[January 03, 2013 Patch]]''' |
||
| − | * {{Undocumented}} Added animations for {{Hero icon|Beastmaster|16px}} [[Beastmaster]], {{Hero |
+ | * {{Undocumented}} Added animations for {{Hero icon|Beastmaster|16px}} [[Beastmaster]], {{Hero ID|Undying}}, and {{Hero ID|Venomancer}} relating to their loadout stance. |
'''[[November 08, 2012 Patch]]''' |
'''[[November 08, 2012 Patch]]''' |
||
| Line 307: | Line 331: | ||
'''[[October 25, 2012 Patch]]''' |
'''[[October 25, 2012 Patch]]''' |
||
| − | * Updated vision values on these abilities: |
+ | * Updated vision values on these abilities: {{Ability ID|Unstable Concoction|Alchemist}}, {{Ability ID|Phantasm|Chaos Knight}}, {{Ability ID|Waveform|Morphling}}, {{Ability ID|Storm Hammer|Sven}}, {{Ability ID|Mirror Image|Naga Siren}}, {{Ability ID|Spirit Lance|Phantom Lancer}}, {{Ability ID|Requiem of Souls|Shadow Fiend}}, {{Ability ID|Spectral Dagger|Spectre}}, [{{Ability ID|Venomous Gale|Venomancer}}, {{Ability ID|Earthbind|Meepo}}, {{Ability ID|Dream Coil|Puck}}, {{Ability ID|Shackleshot|Windranger}}, {{Ability ID|Wall of Replica|Dark Seer}}, {{Ability ID|Flamebreak|Batrider}}, {{Ability ID|Deafening Blast|Invoker}}, {{Ability ID|Ghosthip|Kunkka}}. |
'''[[September 13, 2012 Patch]]''' |
'''[[September 13, 2012 Patch]]''' |
||
| − | * {{Undocumented}} Broken down a number of existing hero models into multiple parts {{Hero |
+ | * {{Undocumented}} Broken down a number of existing hero models into multiple parts {{Hero ID|Death Prophet}}, {{Hero ID|Enchantress}}, {{Hero ID|Huskar}}, {{Hero ID|Silencer}}, {{Hero ID|Sniper}}, {{Hero ID|Storm Spirit}}, {{Hero ID|Venomancer}} and {{Hero ID|Weaver}}. |
'''[[June 14, 2012 Patch]]''' |
'''[[June 14, 2012 Patch]]''' |
||
| Line 358: | Line 382: | ||
'''[[April 09, 2011 Patch]]''' |
'''[[April 09, 2011 Patch]]''' |
||
* Added {{Hero icon|Venomancer|16px}} Venomancer. |
* Added {{Hero icon|Venomancer|16px}} Venomancer. |
||
| − | |||
}} |
}} |
||
== Balance changelog == |
== Balance changelog == |
||
{{Update History| |
{{Update History| |
||
| + | '''6.84''' |
||
| ⚫ | |||
| + | |||
'''6.82''' |
'''6.82''' |
||
| − | * {{Ability ID|Poison Nova|Venomancer}} |
+ | * {{Ability ID|Poison Nova|Venomancer}} can now place its debuff on [[spell immune]] enemies. |
'''6.80''' |
'''6.80''' |
||
| + | * Reduced base attack damage from 24-26 to 19-21 (total attack damage is now 41-43). |
||
| − | * Base damage reduced by 5. |
||
| − | * |
+ | * Reduced base [[health regeneration]] from 0.75 to 0.25. |
'''6.79c''' |
'''6.79c''' |
||
| ⚫ | |||
| ⚫ | |||
| + | * Reduced {{Ability ID|Plague Ward|Venomancer}} vision from {{tooltip|1200|during day}}/{{tooltip|1200|during night}} to {{tooltip|1200|during day}}/{{tooltip|800|during night}} |
||
| ⚫ | |||
| + | |||
'''6.79''' |
'''6.79''' |
||
| + | * {{Ability ID|Venomous Gale|Venomancer}} |
||
| − | * [[File:Poison Nova icon.png|16px]] [[#Poison Nova|Poison Nova]] no longer ignores invis/fogged units. |
||
| + | ** No longer ignores [[invisible]] units and units in the [[fog of war]]. |
||
| − | * [[File:Venomous Gale icon.png|16px]] [[#Venomous Gale|Venomous Gale]] |
||
| ⚫ | |||
| ⚫ | |||
| + | * {{Ability ID|Poison Sting|Venomancer}} |
||
| ⚫ | |||
| ⚫ | |||
| − | * [[File:Poison Sting icon.png|16px]] [[#Poison Sting|Poison Sting]]: |
||
| ⚫ | |||
| ⚫ | |||
| + | * {{Ability ID|Plague Ward|Venomancer}} |
||
| ⚫ | |||
| + | ** Wards now have [[#Poison Sting|Poison Sting]] for 50% of the damage at the current level |
||
| − | * [[File:Plague Ward icon.png|16px]] [[#Plague Ward|Plague Ward]]: |
||
| − | * |
+ | *: When Venomancer and a Plague Ward attack the same target, the one with the stronger damage over time is applied. |
| − | ** |
+ | ** Reduced [[experience]] bounty from 12/12/25/25 to 20/25/30/35. |
| + | * {{Ability ID|Poison Nova|Venomancer}} no longer ignores [[invisible]] units and units in the [[fog of war]]. |
||
'''6.78''' |
'''6.78''' |
||
| − | * |
+ | * Increased {{Ability ID|Poison Sting|Venomancer}} duration from 6/7/8/9 to 6/8/10/12. |
'''6.76''' |
'''6.76''' |
||
| − | * |
+ | * {{Ability ID|Venomous Gale|Venomancer}} |
| − | ** |
+ | ** Rescaled manacost from 90/105/120/135 to 125 on each level. |
| − | ** |
+ | ** Reduced initial damage from 50/70/70/100 to 25/50/75/100. |
| − | ** |
+ | ** Increased damage over time from 10/20/40/50 to 15/30/45/60. |
| − | * |
+ | * Rescaled {{Ability ID|Poison Sting|Venomancer}} duration from 7 on each level to 6/7/8/9. |
'''6.75''' |
'''6.75''' |
||
| − | * |
+ | * Reduced {{Ability ID|Plague Ward|Venomancer}} vision from {{tooltip|1400|during day}}/{{tooltip|1400|during night}} to {{tooltip|1200|during day}}/{{tooltip|1200|during night}}. |
'''6.72''' |
'''6.72''' |
||
| − | * Base |
+ | * Increased Base [[health regeneration]] from 0.25 to 0.75. |
'''6.69''' |
'''6.69''' |
||
| − | * |
+ | * Increased {{Ability ID|Plague Ward|Venomancer}} [[gold]] bounty from 3-9 to 14-17. |
'''6.68''' |
'''6.68''' |
||
| − | * |
+ | * Increased {{Ability ID|Poison Sting|Venomancer}} movement speed slow from 10% on each level to 11%/12%/13%/14%. |
'''6.67''' |
'''6.67''' |
||
| − | * |
+ | * Increased {{Ability ID|Poison Nova|Venomancer}} duration from 12 to 12/14/15. |
| + | * Increased {{Item ID|Aghanim's Scepter}} upgraded {{Ability ID|Poison Nova|Venomancer}} duration from 12 to 14/15/16. |
||
'''6.58''' |
'''6.58''' |
||
| − | * |
+ | * Replaced [[File:Venomous Gale icon.png|16px]] [[#Shadow Strike|Shadow Strike]] with {{Ability ID|Venomous Gale|Venomancer}} |
| + | : ''{{Ability ID|Venomous Gale|Venomancer}}'': |
||
| − | ** Old Shadow Strike: |
||
| ⚫ | |||
| − | *** Decay Damage 10/20/40/50. Initial Damage: 50/70/70/100. Movement Modifier: 50%. Decay Power: 3. Interval: 3. Duration: 15. Cast Range: 400. Cooldown: 22. Mana cost: 90/105/120/135. |
||
| + | :: Cast range: 800 |
||
| − | ** [[File:Venomous Gale icon.png|16px]] [[#Venomous Gale|Venomous Gale]]: |
||
| + | :: Travel distance: 800 |
||
| ⚫ | |||
| + | :: Radius: 125 |
||
| − | *** AoE: 125. Cast Range/Distance: 800. Cooldown: 22. Mana cost: 90/105/120/135. |
||
| + | :: Initial damage: 50/70/70/100 |
||
| − | * Improved [[File:Plague Ward icon.png|16px]] [[#Plague Ward|Plague Ward]] cast range and vision radius |
||
| + | :: Damage over time: 10/20/40/50 |
||
| − | * [[File:Poison Sting icon.png|16px]] [[#Poison Sting|Poison Sting]] is now lethal |
||
| + | :: Movement speed slow: 50% |
||
| + | :: Duration: 15 |
||
| ⚫ | |||
| + | :: Cooldown: 22 |
||
| + | :: Notes: The slow gets weaker over time. The damage over time is applied in 3 second intervals. |
||
| + | |||
| + | * {{Ability ID|Plague Ward|Venomancer}} |
||
| + | ** Increased vision radius from {{tooltip|1200|during day}}/{{tooltip|1200|during night}} to {{tooltip|1400|during day}}/{{tooltip|1400|during night}}. |
||
| + | ** Increased cast range from 400 to 850. |
||
| + | * {{Ability ID|Poison Sting|Venomancer}}´ is now lethal. |
||
| + | |||
| + | '''6.44''' |
||
| + | * Fixed some memory leak issues on {{Ability ID|Poison Nova|Venomancer}}. |
||
'''6.42''' |
'''6.42''' |
||
| + | * {{Ability ID|Plague Ward|Venomancer}} |
||
| − | * Plague Wards now give less gold and cost slightly less mana |
||
| + | ** Reduced [[gold]] bounty from ''unknown'' to 3-9. |
||
| + | ** Reduced manacost from 25 to 20. |
||
| + | ** Reduced cooldown from 6 to 5. |
||
| + | |||
| + | '''6.35''' |
||
| + | * Fixed {{Ability ID|Poison Sting|Venomancer}} slowing [[attack speed]], instead of [[movement speed]]. |
||
| + | |||
| + | '''6.25''' |
||
| + | * Reduced movement speed from 295 to 290. |
||
'''6.20''' |
'''6.20''' |
||
| − | * |
+ | * Reduced attack range from 490 to 450. |
| + | * Fixed some bugs on {{Ability ID|Poison Nova|Venomancer}}. |
||
'''6.17''' |
'''6.17''' |
||
| + | * Reduced movement speed from 300 to 295. |
||
| − | * Balance tweaks done to the following heroes (Don't panic, these are mostly VERY minor, but you guys like to know, so here): |
||
| − | ** Broodmother, Sven, SA, Enigma, Ursa, Tinker, Tiny, Sniper, Troll, Rhasta, Bristleback, Dragon Knight, Venomancer, Viper, Spiritbreaker, Bounty Hunter, Jugg, VS, Zeus, Weaver, Tide Hunter, Enchantress and Silencer. |
||
| − | '''6. |
+ | '''6.15''' |
| + | * Reduced {{Ability ID|Plague Ward|Venomancer}} manacost from 25/25/30/35 to 25 on each level. |
||
| ⚫ | |||
'''6.10''' |
'''6.10''' |
||
| + | * {{Ability ID|Poison Nova|Venomancer}} |
||
| − | * Tweaked poison nova, same overall damage, but over 12 seconds instead of 7. |
||
| + | ** Reduced damage per second from 62/100/138 to 36/58/81. |
||
| ⚫ | |||
| + | * {{Item ID|Aghanim's Scepter}} upgraded {{Ability ID|Poison Nova|Venomancer}} |
||
| + | ** Reduced damage per second from 100/138/185 to 58/81/108 |
||
| + | ** Increased duration from 7 to 12. |
||
'''6.09''' |
'''6.09''' |
||
| + | * Fixed {{Ability ID|Poison Nova|Venomancer}} dummies of the first cast not disappearing when casting again before the first cast finished. |
||
| − | * Recoded Poison Nova to multiinstance, so refresher allowed again |
||
| + | * Venomancer is now allowed to build {{Item ID|Refresher Orb}} again (debuff of Poison Nova still doesnt stack though). |
||
'''6.07''' |
'''6.07''' |
||
| + | * Reduced {{Ability ID|Poison Nova|Venomancer}} radius from ''unknown'' to 575. |
||
| − | * Poison nova range decreased |
||
| + | |||
| + | '''6.06''' |
||
| + | * Venomancer is no longer allowed to build {{Item ID|Refresher Orb}} (disabled because of bugs) |
||
| + | |||
| + | '''6.03b''' |
||
| + | * Fixed {{Ability ID|Poison Nova|Venomancer}} dummies being selectable (and able to build night elf buildings). |
||
| + | |||
| + | '''6.02''' |
||
| + | * Reduced {{Ability ID|Poison Nova|Venomancer}} radius form ''unknown'' to ''unknown''. |
||
| + | |||
| + | '''6.00''' |
||
| + | * Reduced cast time of all spells from 0.5 to 0. |
||
| + | * Recoded {{Ability ID|Poison Nova|Venomancer}} to fix various bugs. |
||
| ⚫ | |||
| + | ** Multiple instances now work properly. |
||
| + | ** Now properly hits all units within range. |
||
| + | ** No longer randomly deals damage to units while passing through them. |
||
}} |
}} |
||
| − | ==Replaced |
+ | == Replaced abilities == |
{{Ability |
{{Ability |
||
| name = Shadow Strike |
| name = Shadow Strike |
||
| + | | image = Venomous Gale |
||
| ⚫ | |||
| + | | sound = |
||
| ⚫ | |||
| + | | lore = A concoction of various stings, poisons, and toxins gathered from the jungles of Jidi Isle, victims surviving it are rare. |
||
| ability = Target Unit |
| ability = Target Unit |
||
| affects = Enemies |
| affects = Enemies |
||
| damagetype = Magical |
| damagetype = Magical |
||
| ⚫ | |||
| key = Q |
| key = Q |
||
| + | | legacy key = D |
||
| ⚫ | |||
| + | |||
| ⚫ | |||
| − | | |
+ | | bkbblock = Partially |
| + | | bkbtext = Cannot be cast on spell immune units. Initial damage and slow pierce spell immunity. |
||
| ⚫ | |||
| + | | purgeable = No |
||
| + | |||
| + | | cast point = 0 |
||
| ⚫ | |||
| + | | trait1 = Cast Range |
||
| value1 = 400 |
| value1 = 400 |
||
| − | | trait2 = |
+ | | trait2 = Initial Damage |
| − | | value2 = |
+ | | value2 = 50/70/70/100 |
| − | | trait3 = |
+ | | trait3 = Damage over Time |
| − | | value3 = |
+ | | value3 = 10/20/40/50 |
| − | | trait4 = |
+ | | trait4 = Move Speed Slow |
| − | | value4 = |
+ | | value4 = 50% |
| − | | trait5 = |
+ | | trait5 = Duration |
| − | | value5 = |
+ | | value5 = 15 |
| + | |||
| − | | notes = * Slow starts at 50% and decreases as time passes. |
||
| + | | mana = 90/105/120/135 |
||
| − | * Total damage dealt is 100/170/270/350. |
||
| ⚫ | |||
| + | |||
| + | | notes = * This ability was replaced by {{Ability ID|Venomous Gale|Venomancer}} in the 6.58 gameplay patch. |
||
| + | |||
| + | * The projectile travels at a speed of 1200 and can be [[disjoint]]ed. |
||
| + | |||
| + | * The [[slow]] deceases in 1 second intervals, slowing the target by 50.0%/40.8%/32.7%/25.9%/20.1%/15.5%/11.7%/8.7%/6.4%/4.6%/3.3%/2.3%/1.6%/1.1%/0.7% on each second. |
||
| + | |||
| + | * A unit with less that 25% of its maximum health can be denied when it has the debuff on. |
||
| + | |||
| + | * Deals the initial damage upon hitting the target and the damage over time in 3 second intervals, resulting in overall 6 damage instances. |
||
| + | |||
| + | * Can deal up to 100/170/270/350 damage to the target (before reductions). |
||
| + | |||
| + | * Successive casts refresh the [[slow]] and damage over time durations and deal the initial damage again. |
||
}} |
}} |
||
== Gallery == |
== Gallery == |
||
<gallery> |
<gallery> |
||
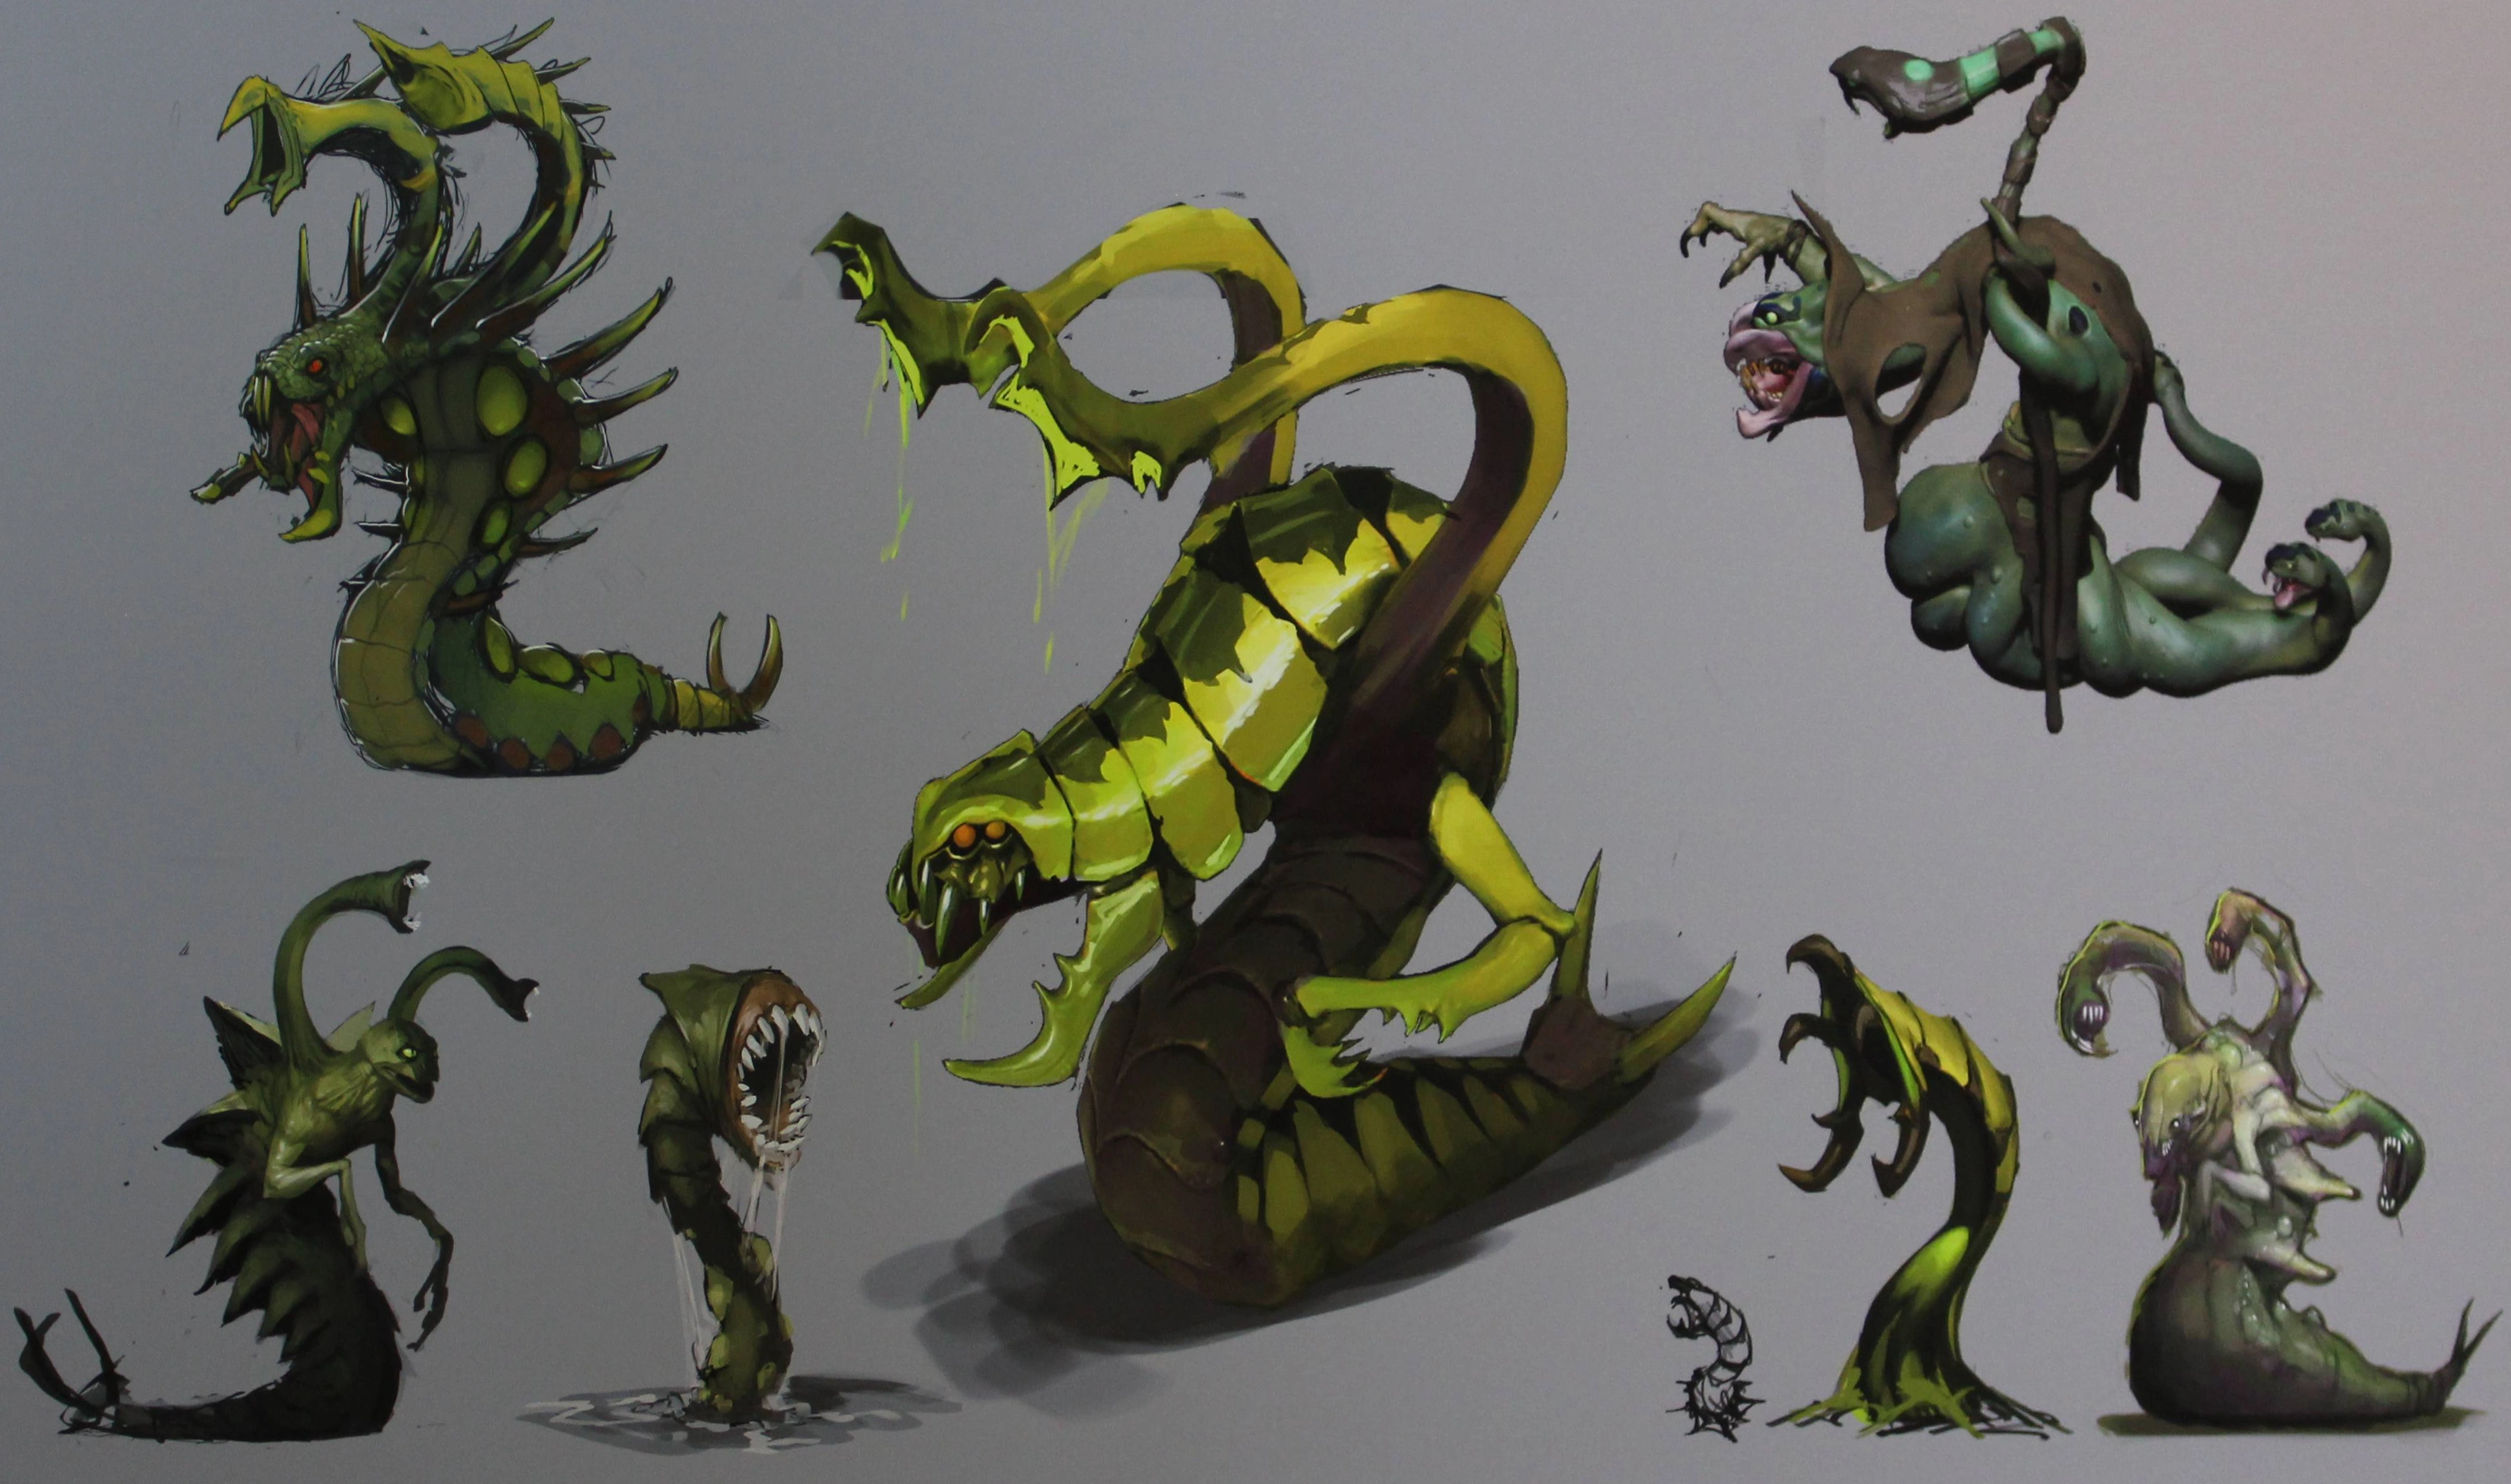
| − | File:Venomancer Concept |
+ | File:Venomancer Concept Art1.jpg|Concept art |
File:Oldmod-veno.png|Model and icons before [[November 21, 2013 Patch]] |
File:Oldmod-veno.png|Model and icons before [[November 21, 2013 Patch]] |
||
</gallery> |
</gallery> |
||
| − | ==See also== |
+ | == See also == |
* [[Venomancer responses]] |
* [[Venomancer responses]] |
||
* [[Venomancer sounds]] |
* [[Venomancer sounds]] |
||
* [[Toxic Gaze]] |
* [[Toxic Gaze]] |
||
| + | |||
| + | == References == |
||
| + | <references /> |
||
{{Dave Fennoy}} |
{{Dave Fennoy}} |
||
Revision as of 16:23, 1 May 2015
| Venomancer
18 + 1.85
22 + 2.6
15 + 1.75
| ||||||||||||||||||||||||||||||||||||||||||||||||||||||||||||||||||||||||||||||||||||||||||||||||||||||||||||||||||||||||||||||||||||||||||||||
|---|---|---|---|---|---|---|---|---|---|---|---|---|---|---|---|---|---|---|---|---|---|---|---|---|---|---|---|---|---|---|---|---|---|---|---|---|---|---|---|---|---|---|---|---|---|---|---|---|---|---|---|---|---|---|---|---|---|---|---|---|---|---|---|---|---|---|---|---|---|---|---|---|---|---|---|---|---|---|---|---|---|---|---|---|---|---|---|---|---|---|---|---|---|---|---|---|---|---|---|---|---|---|---|---|---|---|---|---|---|---|---|---|---|---|---|---|---|---|---|---|---|---|---|---|---|---|---|---|---|---|---|---|---|---|---|---|---|---|---|---|---|---|
| ||||||||||||||||||||||||||||||||||||||||||||||||||||||||||||||||||||||||||||||||||||||||||||||||||||||||||||||||||||||||||||||||||||||||||||||
| ||||||||||||||||||||||||||||||||||||||||||||||||||||||||||||||||||||||||||||||||||||||||||||||||||||||||||||||||||||||||||||||||||||||||||||||
Lesale Deathbringer the Venomancer is a ranged agility hero who is focused on dealing damage over time and slowing enemies down. While unassuming due to his mediocre stats and low attack range, he can inflict surprising amounts of gradual damage with his poisonous abilities if left alone. Venomancer can unleash a Venomous Gale to infect enemies in a straight line, drastically slowing them while dealing damage over time. His attacks are just as hazardous thanks to his lethal Poison Sting, which adds a toxic effect to his normal attacks, poisoning opposing Heroes for a great amount of damage over a duration. Plague Ward lets him summon a sentient ward to a targeted point, which attacks enemies or structures. While weak on first use its power grows in numbers, which means the more the wards are placed the deadlier they become. This gives him good versatility, providing vision, pushing power, and a helpful block, preventing enemies from running away when trapped in a sticky situation. Venomancer's most dangerous ability is Poison Nova, though it isn't lethal and won't kill an enemy by itself, the damage it inflicts is tremendous, the duration is very long, and its wide area of effect makes it difficult to avoid. It is mostly used to initiate battles, since Poison Nova cannot quickly inflict damage but rather degrades its targets over time. When combined together, the Venomancer is a powerful killing machine, like a virus, slowly killing enemies with venom and poisons. Despite being considered by most players as a support, because of his slowing capabilities, extra ward vision, and being item independent, this doesn't hinder his power to gank and kill enemies, especially in the earliest parts of the game, and with enough kills, farm, and domination, Venomancer can transition into a semi-carry, with formidable venomous power and deadly specialties.
Bio
Gameplay
Abilities
- The gale travels at a speed of 1200.
- Can hit units up to 975 range away (850 travel distance + 125 radius).
- The slow deceases over time. Hit units regain 1% of their movement speed in 0.3 second intervals.
- A unit with less that 25% of its maximum health can be denied when it has the Venomous Gale debuff on.
- Deals the initial damage upon hitting enemies, and then deals the damage over time in 3 second intervals, resulting in overall 6 damage instances.
- Venomous Gale can deal up to 75/250/425/600 damage to a single unit (before reductions).
- Fully affects invisible units.
- The damage from Poison Sting does not trigger any on-damage effects. This means that the following spells and items will not react on Poison Sting damage:
- Aphotic Shield, Backtrack, Blade Mail, Blink Dagger, Bottle, Bristleback, Clarity, Cold Snap, Corrosive Skin, Echo Stomp, Fatal Bonds, Healing Salve, Heart of Tarrasque, Kraken Shell, Living Armor, Mana Shield, Mjollnir, Nightmare, Open Wounds, Orchid Malevolence, Recall, Refraction, Lua error in Module:Ability_ID at line 61: Could not find Cargo data for "Return"., Soul Assumption, Spiked Carapace, Spin Web, Summon Spirit Bear and Urn of Shadows.
- The damage ticks in 1 second intervals, starting immediately when the debuff is placed, resulting in 7/10/13/16 damage ticks.
- Can deal up to 35/100/195/320 damage (before reductions).
| Plague Ward | |||||||||||||||||||||||||||||||||
| 150px | |||||||||||||||||||||||||||||||||
| Creep | |||||||||||||||||||||||||||||||||
|---|---|---|---|---|---|---|---|---|---|---|---|---|---|---|---|---|---|---|---|---|---|---|---|---|---|---|---|---|---|---|---|---|---|
| |||||||||||||||||||||||||||||||||
N/A
Enemies
- A Plague Ward will automatically attack the closest enemy unit within its attack range.
- It is possible to manually select an attack target for a Plague Ward.
- It is also possible to stop them from attacking by ordering them to stop, however this only works when the auto-attack option is turned off.
- The Poison Sting from the Plague Ward does not stack with the one from Venomancer. Instead, it places its own separate Poison Sting debuff, which will deal no damage when Venomancer's Poison Sting debuff is active.
- The damage source of the wards' Poison Sting is set to be the wards themselves, and not Venomancer.
- Plague Wards have a lower target priority than units and heroes, so they are attacked by towers and lane creeps last.
- The wards gain their spell immunity through a buff, so it is possible for enemies to check the buff and guess how long it will last.
- The wards' attack damage is not reduced by damage block abilities.
- Interrupts Venomancer's channeling spells upon cast.
- The ring expands with a speed of 500.
- Poison Nova can hit units up to 830 range away (575 travel distance + 255 width).
- Despite the nova having a width, units between the ring and Venomancer will still get hit, even when not within 255 width of the nova ring (such as blinking into the area some time after the spell is cast).
- Deals damage in 1 second intervals, starting immediately as the debuff is placed, resulting in 13/15/16 (15/16/17) ticks.
- Does not tick when affected units turn spell immune, so that Blink Dagger is not disabled.
- Poison Nova can never kill a unit. It will not drop affected units below 1 health from its damage ticks.
- Can deal up to 468/870/1296 (870/1296/1836) damage to a single unit (before reductions).
- Fully affects invisible units.
Recommended items
Template:Recommendeditems
Equipment
Venomancer/equipment
Tips
- In general, Venomancer should be played as a pushing support who provides utility to his team, rather than as a fighter, due to his general frailty and low movement speed. As such, many of the more expensive recommended luxury items that focus on physical damage output should not be built at all, as they provide little comparative benefit and do not synergize well with Venomancer's skills. Instead, focus on building mobility and utility items that help your team without requiring you to jump into the fray outside of casting your spells.
- As an agility caster, Venomancer suffers from severe mana problems. It is recommended to focus on increasing the size of your mana pool and purchasing mana regen items when possible. Due to the high mana cost of Poison Nova, you will need to carefully manage your mana so that you can cast it in a teamfight.
- Venomous Gale applies a strong slow on any enemies it hits, significantly reducing their movement speed. Because of its disable potential, at least one early level is recommended, if not the first spell you take.
- Venomous Gale is one of the best ranged slows at level 1. If you have a tri-lane that has reliable damage output, putting Venomous Gale on a target can ensure a First Blood on the enemy's off-laner.
- Beware that Venomous Gale costs 125 mana, and your mana pool is only 195 at level 1. As such, missing your Venomous Gale during the laning stage will render you unable to cast any other spells for some time unless you have a Clarity or other form of mana regen.
- Keep in mind that Venomous Gale deals no damage over time at level 1. Therefore, if you want the spell to do more than apply a small amount of initial damage and slow its victims, at least one additional level should be taken.
- Try to keep Venomous Gale off cooldown unless it is absolutely needed. Its cooldown is quite long, and you may need to use its slow on enemy heroes when an unexpected situation arises.
- Poison Sting applies a movement speed slow and damage over time to Venomancer's attacks, allowing him to use his right-clicks as a form of disable. Half of the damage from this ability (but not the slow) is also applied to Plague Ward attacks.
- Poison Sting deals small amounts of damage and the slow scales poorly, however it has a very long duration at max level, allowing it to deal a surprising amount of damage over time. The ability is best used to apply a "permanent" movement speed slow to all enemy heroes in a fight or gank, reducing their ability to chase or escape.
- Remember that the damage from Poison Sting itself is not recognized by the game as player damage, and thus enemies can still use their Blink Daggers or regen items even while under the effects of its damage. As such, make sure to regularly attack enemy players with your right-clicks in order to inflict player damage on them.
- Poison Sting is not a Unique Attack Modifier, and as such it can be combined with other slow modifiers such as Orb of Venom to give your attacks increased slowing power.
- Be careful when trying to apply Poison Sting to enemy heroes with your attacks. Venomancer's attack range is quite short, so it is easy to accidentally put yourself out of position.
- When killing creep waves or neutral camps, attack each creep once at the beginning to apply the Poison Sting debuff to all of them. This will drastically increase the amount of damage you can do to them, as they will all be taking damage over time right from the beginning, increasing the net amount of damage you do.
- The idea behind leveling this ability to boost the effectiveness of your Plague Wards is that it allows them to deal the damage over time after you have left them in place and moved on. When using them in active pushes or defense, Venomancer can apply his own Poison Sting to enemy creeps, overriding that of the Plague Wards, but if he needs to go elsewhere after deploying a cluster of wards then they can benefit from Poison Sting and whittle down creep waves more effectively.
- Plague Ward is Venomancer's signature ability, allowing him to place a large number wards in a short duration that augment his firepower and provide vision.
- Plague Wards deal weak damage in sparse numbers and at early levels, but their power becomes significant when once 3 or more skill points are placed in them and they are massed in one location. If you are employing an early push strategy, it is wise to max Plague Wards first in order to put as much cheap Physical damage on the field as possible.
- Venomancer's attack range can effectively be increased by 1000 by casting Plague Wards at their maximum range. While Venomancer's attack range is only 450, he can place Plague Wards up to 850 range away, and they will attack targets 600 range away, boosting his striking range to 1450.
- Plague Wards deal Piercing damage, which means that they deal increased damage against lane creeps but are less effective against towers and siege creeps.
- When pushing a lane, try to place your initial wave of Plague Wards just outside of the enemy tower's attack range. This way, you can safely mass them in order to make short work of the enemy's creep wave as they approach, as well as delay the creep wave at that location and give your creeps time to move forward.
- Once your creep wave moves forward to attack the enemy's tower, only then should you place your second wave of Plague Wards within range to attack the tower. Without cover, the tower can make short work of your Plague Wards, preventing you from massing them. Try to place your ward cluster on the opposite side of the enemy tower, in the direction of the enemy's base, so that they attract the enemy creep wave's aggro and hold them in position, preventing them from attacking your creeps and defending the tower.
- Due to how frail they are and how little damage they do at level 1 and 2, it is not recommended that you cast Plague Wards too frequently during the laning stage, as they will only provide gold and experience for the enemy. As well, while they are spammable and cost small amounts of mana, placing enough to cause any meaningful amount of damage will cost significantly more mana.
- If farming jungle camps with Plague Wards, avoid placing them as the ability comes off cooldown inside the camp itself. This reduces the amount of damage that the wards can do, and will block the camp from spawning if the wards persist at the minute mark. Instead, place a cluster of wards outside of the camp and then aggro the creeps into your wards. This will concentrate their firepower and reduce the amount of damage you take, plus it allows you to use the same ward cluster to work down two or even three neighboring camps simultaneously by pulling them into one location where the wards can attack them and automatically aggro them back with the poison damage.
- Use Plague Wards constantly in order to provide vision of your neighboring area, especially when across the river and inside enemy territory. You can use them to scout out areas behind trees and up cliffs to ensure that enemies cannot initiate on you easily.
- When chasing an enemy, constantly put Plague Wards ahead of them to maintain sight. They can also help slow the enemy by blocking their path.
- You can place Plague Wards within juke paths to block the enemy team's movements if you are fighting in the jungle. This can be used to either stop the enemy from juking by closing off the path that they want to take, or to prevent them from pursuing you after passing through a narrow path by blocking it.
- Remember that you can control your Plague Wards as immovable units. This can be useful if you want to change attack targets, stop a Plague Ward's auto attack or deny friendly creeps and runes, and even destroy the Aegis of the Immortal.
- Poison Nova is a tremendously powerful debuff that can deal large amounts of magical damage to the enemy. While it lacks immediate punch and does not contribute much to a fight at the start, it can potentially kill the entire enemy team after a few seconds, securing kills and allowing your team to take map objectives afterward.
- Even if the enemy activates spell immunity before you can cast your ultimate, keep in mind that the debuff will still be applied to them, and they will start taking damage immediately once their spell immunity expires. While spell immunity will effectively waste a few seconds of your ultimate, it can still deal a lot of damage to them.
- Unless you have teammates who can follow up, do not use Poison Nova out of spite if you are about to be killed, as the cooldown is very long and it will not result in any kills unless the enemy is affected by other damage-over-time debuffs. The only exception to this is if you have Aghanim's Scepter and are level 16 or higher, as the cooldown will then reduce to below your respawn duration.
- Remember that Poison Nova can never bring an enemy below 1 HP by itself. Therefore, you should try to apply Venomous Gale or Poison Sting to your opponents immediately before or after casting Poison Nova, as both debuffs last as long as Poison Nova itself and can help guarantee that they do not survive the Poison Nova.
- Other items not listed under Situational items can be useful to Venomancer's kit:
- Sentry Wards are crucial on Venomancer as a support item. As he can place Plague Wards through terrain and fog of war to get vision, he can easily place Sentry Wards alongside them to de-ward enemy Observer Wards. Since Plague Wards are summoned units, he can "set and forget" them after finding an Observer Ward, rather than risk getting ganked by staying to de-ward.
- Arcane Boots are highly recommended on Venomancer, as his ultimate costs a large amount of mana and his mana pool is otherwise extremely limited. As a support, you also help your team by being able to replenish their mana as well as your own, allowing you to cast your spells more often.
- Force Staff is useful on Venomancer if you're having trouble farming a Blink Dagger. The increased mana pool helps greatly with his ability to cast spells, and the item's active ability serves as a useful escape mechanism on a frail hero without escape abilities.
- Ghost Scepter is very helpful for giving Venomancer protection against physical damage. It can be used to buy yourself some time if you're jumped on by the enemy team in a gank or teamfight, or allow you to survive long enough to cast Venomous Gale after using your ultimate.
- Shiva's Guard is expensive, but provides Venomancer with many strong benefits. It gives him a much larger mana pool to use, allowing him to better utilize his spells, and gives him armor for resisting physical damage. The auras add to his ability to slow enemy heroes, and the active can be used in conjunction with Poison Nova to slow enemies enough to catch them in its radius, as well as add an additional movement speed slow on top of Venomous Gale and Poison Sting.
- Scythe of Vyse is a very farm-intensive item to purchase, however it will permanently solve all of Venomancer's mana issues while also giving him an instant hard disable that he can cast on the enemy in a teamfight, even in the late game.
Trivia
- Venomancer's name, Lesale, may be a reference to "Le Sale", which is French for "The Dirty" or "The Nasty".
- In Warcraft DotA, Venomancer's hero model was a hydralisk. Hydralisks are a ranged combat unit of the Zerg, an alien race in Blizzard Entertainment's RTS game Starcraft. Hydralisks are a very common and well-known image in Blizzard games.[1]
Update history
Template:Update History
Balance changelog
Template:Update History
Replaced abilities
- This ability was replaced by Venomous Gale in the 6.58 gameplay patch.
- The projectile travels at a speed of 1200 and can be disjointed.
- The slow deceases in 1 second intervals, slowing the target by 50.0%/40.8%/32.7%/25.9%/20.1%/15.5%/11.7%/8.7%/6.4%/4.6%/3.3%/2.3%/1.6%/1.1%/0.7% on each second.
- A unit with less that 25% of its maximum health can be denied when it has the debuff on.
- Deals the initial damage upon hitting the target and the damage over time in 3 second intervals, resulting in overall 6 damage instances.
- Can deal up to 100/170/270/350 damage to the target (before reductions).
- Successive casts refresh the slow and damage over time durations and deal the initial damage again.
Gallery
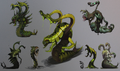
Concept art

Model and icons before November 21, 2013 Patch
See also
- Venomancer responses
- Venomancer sounds
- Toxic Gaze
References
- ↑ [1]Hydralisks, the model Venomancer uses in DotA.
| ||||||||
Template:HeroNav